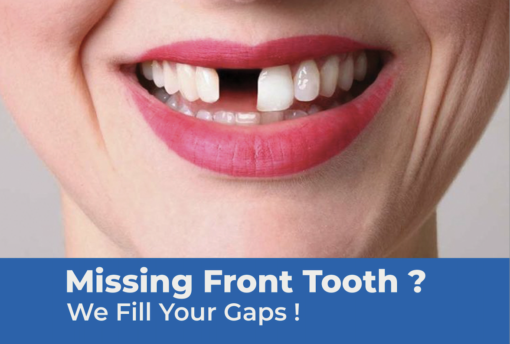
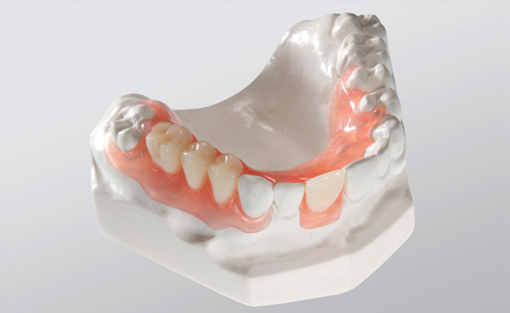
Have you ever thought of putting in a flipper tooth? It’s an easy way to replace missing teeth without having to spend a lot of money. A flipper tooth, also known as a dental flipper, is a removable partial denture designed to fill the gap left by a missing tooth. It is a temporary appliance that fits over your existing teeth to replace a missing tooth. It’s a great option if you’re not ready to commit to a more permanent solution like implants. Putting in it is a relatively easy process, but it’s important to do it correctly to ensure a comfortable fit and optimal results. It typically costs between $300 – $500, depending on the number of teeth you need and the material used.
Whether you’re using a flipper for aesthetic reasons or during the process of getting a permanent tooth replacement, learning how to properly insert and care for it is essential. In this article, we’ll provide a step-by-step guide on how to put in a flipper tooth.
Guide On How To Put In a Flipper Tooth.
It’s made by first taking an impression of your mouth with a soft material. The impression is then sent to a dental laboratory, which uses it to make a customized flipper tooth designed to fit your mouth and fill any gaps in your teeth with prosthetic teeth.
1. Gather the Necessary Supplies for Flipper Tooth
Tooth impressions: To make this, you’ll need to take a dental impression of the inside of your mouth. This will be sent off to a lab, where they will use it to create a custom-made flipper tooth.
Buccal boards: These are thin pieces of plastic that are placed inside your mouth to keep the dental impressions in place. You’ll need two sets to hold the images in both the upper and lower dentition.

Mouthwash or water: You’ll want to clean your mouth thoroughly before taking dental impressions, as bacteria can affect the impression quality and lead to an inaccurate You can also use water instead of mouthwash if you prefer.
2. Prepare the Flipper Tooth
Once you’ve received the dental impressions back, you can start preparing. First, clean the tooth thoroughly before removing any packaging. If the tooth is a loose-fit model, you can start fitting it right away. If the tooth is a tight-fit model, you’ll need to gently remove some of the excess material from the inside of the tooth before fitting it.
3. Take Measurements and Make Adjustments
Once you’ve fitted the tooth you can now take the necessary measurements to make any adjustments to the fit. First, place the flipper tooth in your mouth to see if it fits. If they feel loose, you can add rubber bands to the teeth to make them tighter. If the feels too tight, you can use a file to remove material from the inside of the flipper tooth to make it looser.
4. Attach the flipper tooth
Once you’ve made any adjustments to the fit, you can now attach the tooth. You can use adhesive or flipper cement to attach the tooth. Most brands of flipper adhesives and cement are safe to use for adults, children, and infants. If you’re using a flipper adhesive, open the adhesive and squeeze a small amount onto the backside of the tooth. Next, bring the flipper tooth into your mouth and position it in the desired location. Finally, press the flipper tooth into place with your tongue to make sure it is secure.
5. Clean and care for the flipper tooth
Like with your mouth, you’ll want to maintain the flipper tooth and keep it clean. You can use a toothbrush and toothpaste to clean. You can also use a floss pick to clean in between the flipper tooth and adjacent teeth.

When cleaning the flipper tooth, be gentle and don’t scrub hard. Scrubbing too hard can damage them and can lead to other dental problems like gum disease. To protect the flipper tooth, you’ll want to keep it out of your mouth while eating and drinking.
6. Troubleshooting tips
It feels too loose and falls out of your mouth, it may be time for a new one. You can get a new dental impression and have a new flipper tooth custom-made for you. Keep the old ones around in case you ever need a template to help you put in the new flipper tooth correctly. If the flipper tooth feels too tight and is difficult to put in and take out, it may be time to make adjustments. First, try taking the flipper tooth out and putting it back in a few times to loosen it up a bit. Second, use a file to remove a little bit of material from the inside.
Alternatives To Flipper Teeth for Replacing Missing One
Before you choose flipper teeth, you may want to explore some alternatives. First, you can use a partial denture. This is a more permanent option that you can use while you’re waiting for a bridge or implant.
You can also use a removable partial denture if you don’t want a permanent solution. Another option is a bridge. This is a permanent solution that uses two adjacent teeth to support a fake tooth in the middle. The teeth on both sides of the middle tooth will need to be filed down to accommodate the fake tooth.
Conclusion
For people who are missing one or more it’s, this can be a great solution. they are easy to put in, affordable, and can be used for a number of situations, including until you’re ready to get a bridge or an implant. Before you start the flipper tooth process, make sure you have the right supplies and are prepared for any slight adjustments that may be required.


