One important component that frequently steals the show in the delicate field of dentistry—where science and creativity collide—is the dental impression. Think of it as the initial brushstroke on an empty canvas, laying the foundation for an incredible work of art. You have no idea the elaborate ballet of dexterity and expertise that is about to take place as you sit back in the dentist chair, anticipating the procedure with bated breath. Let’s explore the intriguing realm of dental impressions today and discover the mysteries that combine the art and science of your dentist’s work.
What is a Dental Impression?
Dental impressions are negative replicas that precisely capture the characteristics of your teeth and surrounding tissues, similar to the photos that dentists take of your oral cavity. Consider it an impression or mold, like a sculpture casting. During this procedure, certain materials are used to imprint your teeth in a way that accurately captures the distinct curves, forms, and placements of each tooth.
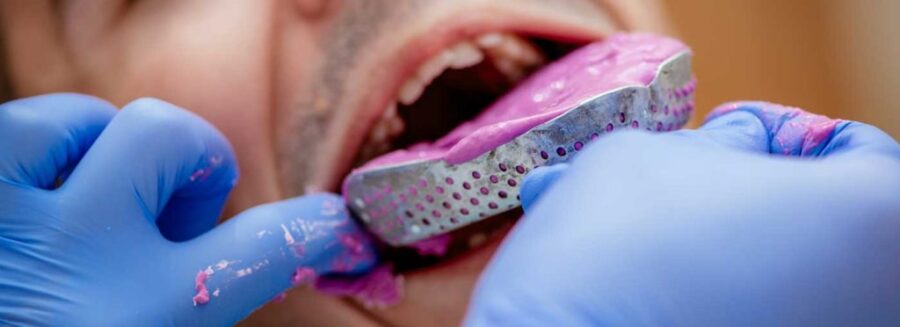
Dental imprints are used to provide dentists with a precise and physical depiction of your mouth anatomy. With the help of this negative duplicate, dentists may accurately replicate the shape of your teeth and surrounding tissues throughout a variety of dental treatments.
Types of Dental Impression
Conventional Impressions
Alginate: Used for crowns and bridges, alginate impressions involve a mixture of alginate powder and water. This material captures the initial impression of the teeth and surrounding structures.
Putty: Employed for creating impressions for bridges, putty is a versatile material that comes in a pliable, moldable form, allowing dentists to achieve detailed impressions.
Impression Compound: Ideal for complete dentures, impression compound is a thermoplastic material that becomes pliable when heated. It helps capture the overall shape of the oral structures.
Zinc Oxide Eugenol Paste: Reserved for final impressions, this paste offers precise detailing for dental prosthetics. It contains zinc oxide and eugenol, providing accuracy in replicating the oral structure.
Digital Impressions
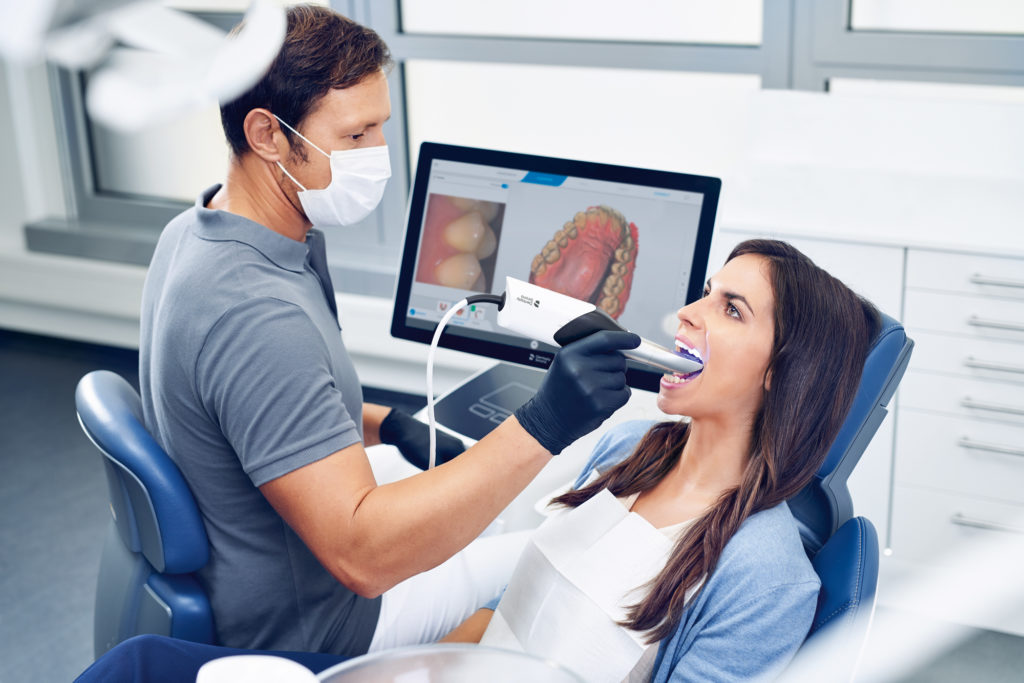
Intraoral Scanning: By embracing technology, intraoral scanning eliminates the need for traditional impression materials. Using digital scanners, dentists capture a 3D image of the oral cavity, providing a highly accurate and efficient alternative to conventional impressions.
Dental Impression Making
Impression Trays
In the complex world of dental impressions, selecting the right trays is essential to accurately capture the mouth cavity’s characteristics. Impression trays come in two varieties that dentists frequently use: perforated and non-perforated.
Perforated Trays: When the tray is placed in the patient’s mouth, the small holes, or perforations, allow extra impression material to escape. This design reduces the possibility of deformation and guarantees a more uniform distribution of the material.
Non-perforated Trays: As the name implies, there are no holes in these trays. When a more regulated application of the imprint material is required, it is usually utilized. When accuracy is essential, non-perforated trays are frequently chosen.
Preparation of the Patient
Before embarking on the impression-making journey, the preparation of the patient is a critical step that sets the stage for a successful procedure. Several key considerations come into play:
- Ensuring the patient is seated upright is essential to prevent gagging and discomfort during the impression process. This position enhances cooperation and facilitates a smoother experience.
- Draping the patient not only maintains their privacy but also contributes to a sterile and controlled environment. It creates a professional atmosphere and underscores the importance of hygiene in dental procedures.
- To optimize the impression’s accuracy, it is advisable to ask the patient to rinse their mouth with water before the procedure. This step helps eliminate any debris or contaminants that could compromise the quality of the impression.
- Handing over a tissue to the patient is a thoughtful touch. It allows them to manage any residual water or saliva, fostering a sense of comfort and involvement in the process.
Alginate Impression Material
Instruments Required
- Plastic Scoop
- Plastic Cylinder
- Perforated Trays
- Mixing Bowl
- Stainless Steel Spatula
Manipulation
- Even Distribution: Shake the alginate powder evenly to ensure a uniform distribution of particles.
- Accurate Measurement: Utilize specific measuring devices for both water and powder, ensuring exact measurements.
- Wetting the Powder: Place the measured water in a clean, dry bowl. Gradually shift the powder into the water, ensuring even wetting of the powder.
- Mixing Process: Mix the alginate for a specified duration. Use a stiff spatula to ‘swipe’ the alginate mass against the sides of the bowl, preventing air entrapment in the mixture.
Loading of Tray
Use a perforated tray to allow slight material extrusion through the tray holes. Smooth the alginate’s surface by moistening a finger with water and running it over the alginate.
After Taking the Impression
Scrape off any remaining alginate material from the mixing bowl and discard it in the bin. Clean and sterilise all instruments used in the process.
Disinfecting the Impression
Gently rinse the impression under tap water to remove debris (such as saliva) retained in the impression. Spray the impression with a disinfectant and wrap it in a disinfectant-soaked paper towel. Immediately hand it over to the lab technician for further processing.
Dental Impression Compound
Instruments Required
- Bowl
- Hot, Warm Water
- Gauze
- Wax Spatula
Manipulation of Impression Compound
Tray Selection: Choose an appropriate tray for the specific dental impression you are aiming to create.
Breaking the Compound: As the impression compound is supplied in sheets, begin by breaking it into manageable pieces. This facilitates the subsequent softening process.
Softening: Immerse the broken pieces of impression compound in hot, warm water. This softening step is crucial for achieving pliability and moldability.
Hand Kneading: Once softened, knead the impression compound by hand. This manual manipulation ensures even consistency, making it easier to work with.
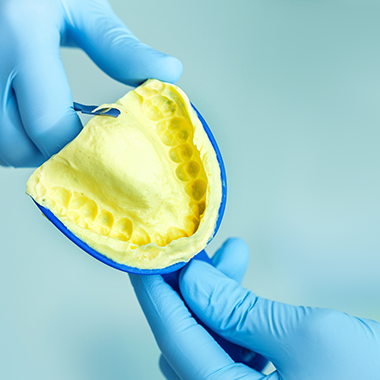
Loading: Place the kneaded impression compound into the selected tray. This step involves carefully positioning the compound to capture the desired oral structures.
Performing: Shape the impression compound to conform to the contours of the dental arch. This performance step helps in achieving a more accurate and detailed impression.
Glazing: After loading and performing, ensure a smooth surface by glazing over the impression compound. This step enhances the overall quality of the impression.
Tempering: To achieve optimal hardness and stability, temper the impression compound. This is typically done by cooling the material, ensuring it maintains its form and structure.
Zinc Oxide Eugenol Impression Paste
Instruments Required
- Glass Slab
- Stainless Steel Spatula
Manipulation
Crafting precise impressions with Zinc Oxide Eugenol impression paste involves a methodical process:
- Mixing Surface: Utilize a glass slab as the mixing surface, ensuring a clean and smooth area for the manipulation of the impression paste.
- Two Separate Pastes: The Zinc Oxide Eugenol Impression Paste is supplied in two separate pastes. On the mixing slab, squeeze out two ropes of paste of equal length and width.
- Mixing Tool: Employ a stainless steel spatula for the mixing process. This tool is essential for blending the two separate pastes effectively.
- Combining the Pastes: Using the spatula, combine the two ropes of paste until a uniform color is achieved. This thorough mixing is critical to ensuring homogeneity and consistency in the final impression material.
Putty Impression Materials
Mixing
Creating accurate impressions with putty impression materials involves a specific mixing process tailored to their consistency. There are two common methods:
Using a Proper Pad and Spatula (Light-Medium Consistency):
- For putty materials with a light to medium consistency, the recommended method involves using a proper mixing pad and spatula.
- Dispense the appropriate amounts of putty onto the mixing pad.
- Use a spatula to blend the components thoroughly until a uniform consistency is achieved. This ensures an even distribution of materials, contributing to the precision of the impression.
Hand Kneading (Heavy or Putty Consistency):
- Putty materials with a heavy or putty consistency require a different approach.
- Begin by dispensing the required amount of putty onto a clean surface.
- Engage in hand kneading, using the warmth and pressure from your hands to manipulate the putty until it reaches a pliable and uniform texture.
- This manual method ensures proper mixing and homogeneity in the material.
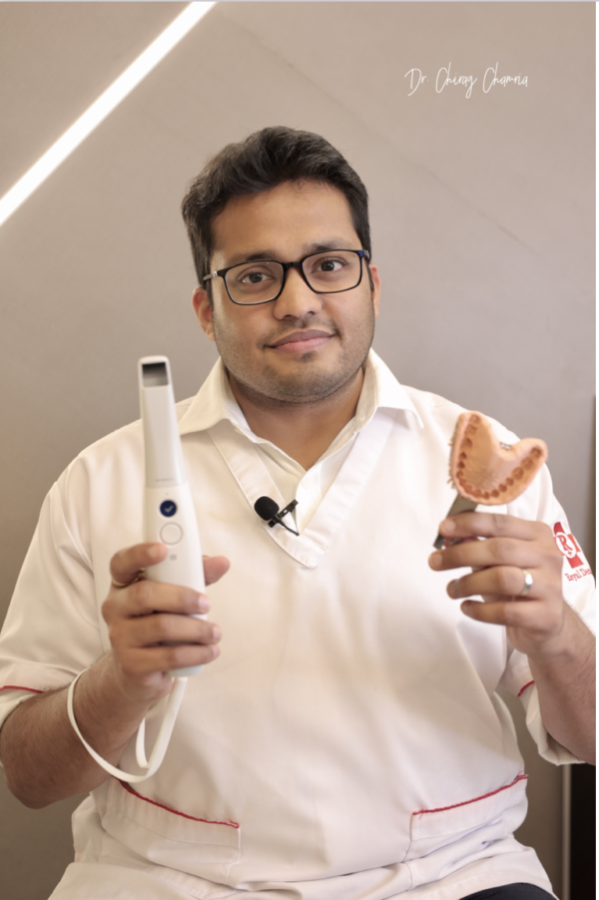
Intraoral Scanner
The intraoral scanner stands as a technological marvel, offering a precise and efficient method for capturing detailed models crucial to various orthodontic treatments. This includes applications in braces, diagnostic models, mouth guards, and aligners. Here’s a breakdown of its significance and proper usage:
Usage and Significance
Intraoral scanners provide an accurate means to capture models necessary for orthodontic treatments like braces, aligners, and mouth guards. The scanner enables the creation of 3D impressions of a patient’s mouth, serving as a valuable tool for diagnostic models and treatment planning. The obtained 3D impressions are seamlessly transferred to a dental lab for the fabrication of various dental appliances.
Steps to Register a Patient in Medit Link Software
- Begin by opening the Medit Link software.
- Within the software, locate the case box and initiate a new case.
- Input relevant patient details, including the patient’s name and company name. The company name, in this case, is “RDC,” representing Royal Dental Clinics.
- Complete the registration process and initiate the scanning procedure.
- Upon scanning, choose the option for intraoral scanning.
- Proceed to the arch section, and specifically select the maxilla (upper jaw).
- Within the maxilla, commence with the creation of the diagnostic model.
- Repeat the same steps for the mandibular (lower jaw).
Disinfection of Intraoral Scanner
Manual Cleaning: Start by manually cleaning the tip using soap and water. If necessary, use a brush for a thorough cleaning.
Rinse and Dry: Rinse the tip and ensure it is thoroughly dried before proceeding to the next step.
Sterilization Pouch: Place the tip in a paper sterilization pouch to maintain its cleanliness.
Autoclave Sterilization: The final step involves sterilizing the tip in an autoclave. Ensure that the tip is approved for autoclaving, with a specified limit of 150 times.
Points to Remember
The intraoral scanner demands careful handling during cleaning procedures. When transporting the scanner, ensure the suitcase is securely locked to prevent any damage.
Conclusion
As we come to the end of our journey through the world of dental impressions, it is clear that behind the clinical environment and white coat there is an art form, one that has been masterfully crafted by experts like Dr. Chirag Chamria. Your oral health journey begins with your dental impression, a work of art in and of itself. So, the next time you’re sitting in that chair, try to picture the dexterity, talent, and creativity that go into creating the ideal grin. Ultimately, your dentist is an artist creating the painting of your oral health, not merely a medical professional.

